Mastering How to Make Bannock Bread: A Canadian Tradition

A person prepares tea during a relaxed outdoor camping breakfast.Photo: Gaspar Zaldo / Pexels

Mastering How to Make Bannock Bread: A Canadian Tradition

Unlock the secrets to crafting delicious, versatile bannock, a cherished part of Canadian culinary heritage, perfect for any occasion.

Start Baking Now

Key Takeaways

  • ✓ Bannock is a traditional Indigenous bread with roots in Scotland, adapted by First Nations people across Canada.
  • ✓ It's incredibly versatile, cooked in various ways: fried, baked, or over an open fire.
  • ✓ The basic recipe requires only a few pantry staples: flour, baking powder, salt, fat, and water.
  • ✓ Modern bannock can be customized with sweet or savoury additions like berries, cheese, or herbs.

How It Works

1
Gather Your Ingredients

Ensure you have all the necessary dry and wet ingredients pre-measured. This includes flour, baking powder, salt, a fat source, and water.

2
Combine Dry & Wet

Mix the dry ingredients thoroughly in a bowl, then gradually add the wet ingredients. Mix until a shaggy dough forms, avoiding overmixing.

3
Knead Lightly & Shape

Turn the dough onto a floured surface and knead gently for a minute or two. Shape it into a disc or smaller individual pieces, depending on your cooking method.

4
Cook to Golden Perfection

Whether frying, baking, or cooking over a fire, ensure the bannock cooks evenly until golden brown and cooked through. Serve warm with your favourite toppings.

The Rich History and Cultural Significance of Bannock

A woman cooks over an open flame in a traditional kitchen in Chota, Cajamarca, Peru.
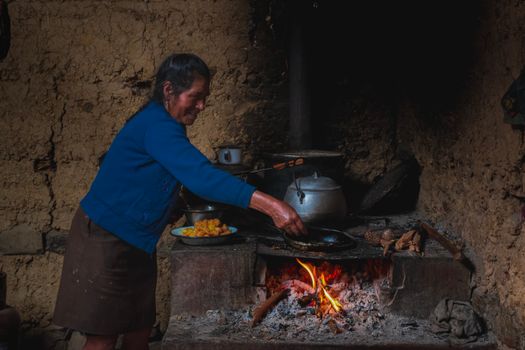
Photo: Gilmer Diaz Estela / Pexels
Bannock, a simple yet profoundly significant bread, holds a special place in the hearts and history of many Canadians, particularly Indigenous peoples. While often associated with First Nations, Métis, and Inuit communities, its origins are somewhat complex, tracing back to a Scottish flatbread brought over by European fur traders. Indigenous communities, resourceful and adaptable, adopted and transformed this basic recipe, making it their own. They substituted traditional grains with readily available flour and incorporated local fats, creating a versatile and nourishing staple that could be cooked in various ways – over an open fire, baked in a pan, or fried. This adaptation speaks volumes about the resilience and innovation of Indigenous cultures. Bannock became a crucial food source, especially during hunting and trapping expeditions, providing sustenance in remote areas. It was easy to prepare with minimal ingredients, making it ideal for a nomadic lifestyle. Beyond its practical utility, bannock evolved into a symbol of cultural exchange, survival, and community. It's frequently served at gatherings, ceremonies, and family meals, representing connection and shared heritage. Understanding this rich history enhances the appreciation of every bite. It's not just bread; it's a culinary bridge between past and present, a testament to enduring traditions. Many Indigenous communities continue to share their unique bannock recipes, often passed down through generations, each with subtle variations that tell a regional story. For instance, some may use cornmeal, while others might incorporate berries or dried meat, reflecting the diverse landscapes and foodways across Canada. Learning how to make bannock bread is, in essence, participating in a living history, honouring the ingenuity and cultural richness that defines this land. It’s an experience that goes beyond mere cooking; it’s an act of respect and recognition for the deep roots of this beloved food. Exploring traditional Indigenous foods offers further insight into Canada's culinary tapestry.

Essential Ingredients for Perfect Bannock Bread

Crafting the perfect bannock bread begins with understanding its core ingredients. The beauty of bannock lies in its simplicity, requiring only a handful of pantry staples, making it accessible to virtually anyone, anywhere. The foundation is, of course, flour. All-purpose white flour is most commonly used due to its availability and versatility, yielding a light and fluffy texture. However, some traditional recipes or modern variations might call for whole wheat flour, cornmeal, or even a blend, which can impart a nuttier flavour and denser texture. Experimenting with flour types is part of the fun in making bannock your own. Next up is the leavening agent: baking powder. This is crucial for giving the bannock its characteristic rise and soft interior. Without it, you'd end up with a very dense, cracker-like product. The amount of baking powder can be adjusted slightly based on how light and airy you prefer your bannock. A pinch of salt is vital for flavour. It balances the sweetness (if adding any) and enhances the overall taste of the bread. Don't skip it, as bland bannock is a missed opportunity! The fat component is where some variation comes into play. Traditionally, rendered animal fat (like lard or bear grease) was used, providing richness and a tender crumb. Today, many recipes opt for vegetable shortening, butter, or even vegetable oil. Each fat imparts a slightly different flavour and texture. Shortening often results in a very tender bannock, while butter adds a lovely dairy note. The final essential ingredient is water, or sometimes milk. Water is the simplest and most common choice, binding the ingredients together to form a dough. The amount of water needed can vary depending on the flour type and humidity, so it's best to add it gradually until a soft, shaggy dough forms. Some people prefer milk for a richer flavour and softer texture. Optional additions, though not strictly essential for basic bannock, can elevate your creation. These include sugar (for a slightly sweet version, often preferred for breakfast), dried fruits like raisins or cranberries, cheese, herbs, or even cooked meats for a savoury twist. Understanding the role of each ingredient empowers you to adapt and perfect your bannock bread to your personal preference, making it a truly versatile and endlessly enjoyable food.

Step-by-Step Guide: How to Make Bannock Bread at Home

Making bannock bread at home is a rewarding experience, offering a taste of Canadian heritage right in your kitchen. This comprehensive guide will walk you through the process, ensuring a delicious outcome every time. We'll focus on a versatile baked version, but the dough preparation is largely the same for other cooking methods. **Step 1: Gather and Measure Your Ingredients.** Before you begin, ensure all your ingredients are measured out and ready. For a basic bannock, you'll need: * 3 cups all-purpose flour * 1 tablespoon baking powder * 1 teaspoon salt * 1/4 cup solid fat (shortening, lard, or cold butter, cut into small pieces) * 1 to 1.5 cups cold water (or milk, for a richer taste) **Step 2: Combine Dry Ingredients.** In a large mixing bowl, whisk together the flour, baking powder, and salt. Make sure these are thoroughly combined to ensure even leavening throughout the bread. This step is crucial for achieving that light and airy texture. **Step 3: Cut in the Fat.** Add the solid fat to the dry ingredients. Using your fingertips, a pastry blender, or two knives, cut the fat into the flour mixture until it resembles coarse crumbs with some pea-sized pieces. This technique creates pockets of fat that will melt during cooking, contributing to a tender crumb. If using oil, you'll add it with the wet ingredients. **Step 4: Gradually Add Liquid.** Make a well in the center of the flour mixture. Pour in about 1 cup of cold water (or milk). Using a fork or your hands, gently mix the liquid into the dry ingredients, working from the center outwards. Add more water, a tablespoon at a time, until the dough just comes together. Be careful not to add too much liquid; the dough should be soft but not sticky. It's better to have a slightly drier dough that you can add more water to, than a too-wet dough that requires more flour. **Step 5: Lightly Knead and Shape.** Turn the shaggy dough out onto a lightly floured surface. Gently knead it for about 1-2 minutes, just enough to bring it together into a cohesive ball. Avoid over-kneading, as this can develop the gluten too much, resulting in tough bannock. Shape the dough into a disc about 1-inch thick. You can also divide the dough into smaller portions to make individual bannock pieces. **Step 6: Prepare for Baking.** Preheat your oven to 375°F (190°C). Lightly grease a baking sheet or cast-iron pan. Place the bannock disc(s) on the prepared pan. If baking a large disc, you might want to score the top with a knife, creating a cross-hatch pattern. This isn't strictly necessary but can help with even cooking and makes it easier to break apart later. **Step 7: Bake to Golden Perfection.** Bake for 25-35 minutes, or until the bannock is golden brown on top and sounds hollow when tapped on the bottom. The exact baking time will depend on the thickness of your bannock and your oven. If making individual pieces, they might cook faster, around 15-20 minutes. For more baking tips and techniques, check out our guide to perfect bread. **Step 8: Serve Warm.** Once baked, remove the bannock from the oven and let it cool slightly on a wire rack. Bannock is best served warm, fresh from the oven, with butter, jam, maple syrup, or as a side to a hearty stew. Enjoy your homemade taste of tradition!

Tips for Perfect Bannock & Common Mistakes to Avoid

Achieving perfect bannock every time is within reach with a few key tips and by knowing what pitfalls to avoid. **Tips for Success:** * **Don't Overmix:** This is perhaps the most crucial rule for tender bannock. Overmixing develops gluten, leading to a tough, rubbery texture. Mix just until the ingredients are combined and a shaggy dough forms, then knead very lightly, just enough to bring it together. * **Use Cold Fat and Water:** If using solid fat like butter or shortening, ensure it's cold. This helps create those desirable pockets of fat that steam during cooking, resulting in a lighter, flakier texture. Cold water also helps keep the fat from melting prematurely. * **Adjust Liquid Gradually:** Different flours absorb liquid differently, and humidity can play a role. Start with the lower end of the liquid recommendation and add more, a tablespoon at a time, until the dough is soft and cohesive, but not sticky. * **Experiment with Cooking Methods:** While baking is convenient, try frying bannock in a pan with a bit of oil for a crispy exterior and soft interior, or cook it over an open fire (on a stick or in a pan) for an authentic, smoky flavour. Each method offers a unique experience. * **Customize Your Bannock:** Don't be afraid to add your own twist! Incorporate dried fruits, cheese, herbs, spices, or even a touch of sugar for a sweeter version. This is where bannock truly becomes your own. * **Serve Warm:** Bannock is best enjoyed warm. Reheat leftovers gently in a pan or oven to restore its delicious texture. **Common Mistakes to Avoid:** * **Too Much Flour on the Surface:** When kneading, use minimal extra flour on your work surface. Too much can make your bannock dry and dense. * **Under or Overcooking:** Raw dough is unappetizing, and burnt bannock is equally so. Ensure it's golden brown and cooked through. If baking a large disc, tapping the bottom should produce a hollow sound. * **Forgetting Salt:** While a small ingredient, salt is essential for flavour. Without it, your bannock will taste bland. * **Not Resting the Dough (Optional but Recommended):** While not strictly required, letting the dough rest for 10-15 minutes after mixing can help relax the gluten, potentially leading to a more tender result. * **Using Stale Baking Powder:** Baking powder loses its potency over time. Ensure yours is fresh for proper leavening. You can test it by adding a teaspoon to a small amount of hot water; it should bubble vigorously. By keeping these tips in mind and avoiding common pitfalls, you'll be well on your way to mastering the art of making delicious bannock bread, a true Canadian comfort food.

Comparison

FeatureBaked BannockFried BannockCampfire Bannock
TextureSoft, even crumbCrispy exterior, soft interiorChewy, smoky crust, dense interior
Cook Time25-35 minutes10-15 minutes15-30 minutes (variable)
EquipmentOven, baking sheetFrying pan, stoveStick, cast iron, open fire
Fat UseMinimal (in dough)Moderate (for frying)Minimal (in dough)
Flavor ProfileMild, adaptableRich, slightly oilyEarthy, smoky
Ease of PrepEasyEasyMedium (requires fire management)

What Our Readers Say

5 ★★★★★

"This guide made making bannock bread so approachable! I've always wanted to try it, and the step-by-step instructions resulted in the most delicious, fluffy bread. My family absolutely loved it with jam for breakfast."

5 ★★★★★

"As an avid camper, I've tried many bannock recipes. This one is fantastic – especially the tips on not overmixing. My campfire bannock turned out perfectly golden and chewy, a new staple for our trips."

5 ★★★★★

"I followed the baked bannock recipe and added some dried cranberries and a touch of maple sugar. It was an incredible success! The bread was tender and flavourful, a perfect accompaniment to our soup."

4 ★★★★☆

"The recipe was clear and easy to follow. My first attempt was a bit dense, but after reading the 'avoid overmixing' tip in the troubleshooting section, my second batch was much lighter. A great resource for a Canadian classic."

5 ★★★★★

"Learning about the history of bannock alongside the recipe was a wonderful bonus. It made the whole experience more meaningful. I made the fried version, and it was a hit with butter and homemade berry preserves."

Frequently Asked Questions

What is the best type of flour for bannock bread?
All-purpose white flour is the most common and recommended choice for a light and fluffy bannock. However, you can experiment with whole wheat flour for a denser, nuttier bread, or a blend of flours to find your preferred texture and taste. The key is to adjust the liquid content accordingly.
My bannock turned out tough, what did I do wrong?
A tough bannock is almost always a sign of overmixing the dough. When kneading, only work the dough just enough to bring it together into a cohesive ball, about 1-2 minutes. Overworking develops the gluten, which leads to a chewy, tough texture. Gentle handling is key for tender bannock.
Can I make bannock dough ahead of time?
Yes, you can prepare bannock dough ahead of time. Once mixed, wrap the dough tightly in plastic wrap and refrigerate for up to 24 hours. Allow it to come to room temperature for about 15-20 minutes before shaping and cooking for the best results. This can be very convenient for camping trips.
Is bannock bread expensive to make?
No, bannock bread is incredibly inexpensive to make. Its basic ingredients – flour, baking powder, salt, fat, and water – are common, low-cost pantry staples. This affordability was one of its key advantages historically, making it a sustainable and accessible food source for many communities.
How does bannock compare to traditional European breads?
Bannock is generally much simpler and quicker to make than many traditional European breads, which often require yeast, multiple proofing stages, and longer baking times. Bannock relies on baking powder for leavening, resulting in a dense yet tender crumb, more akin to a biscuit or scone, rather than a crusty, airy loaf.
Who should try making bannock bread?
Anyone interested in Canadian culinary heritage, simple baking, or looking for a versatile and comforting bread should try making bannock. It's particularly popular with campers, hikers, and those who appreciate rustic, easy-to-make foods that feed a crowd or provide quick sustenance.
Are there any health considerations when eating bannock?
Bannock, particularly the traditional fried versions, can be calorie-dense and high in carbohydrates. While it provides excellent energy, moderation is key, especially if you're not engaged in strenuous activity. Modern versions can be made healthier by baking, using whole wheat flour, and reducing added fats or sugars.
What are some modern twists on traditional bannock?
Modern bannock recipes often incorporate diverse ingredients like cheese and herbs for a savoury bread, or dried fruits, nuts, and spices for a sweet treat. Some chefs experiment with different flours like cornmeal or oat flour, while others might add cultural ingredients like Saskatoon berries or maple syrup, constantly evolving this historic food.

Now that you're equipped with the knowledge and techniques, it's time to embark on your own culinary journey and master how to make bannock bread. Whether you're baking it in your kitchen or cooking it over a crackling campfire, this versatile and historically rich bread is sure to become a cherished favourite. Gather your ingredients, embrace the tradition, and enjoy the delicious results of your homemade bannock.

Topics: how to make bannock breadbannock recipetraditional bannockcamping breadindigenous bread
Leo List
Brampton weed
Adultwork